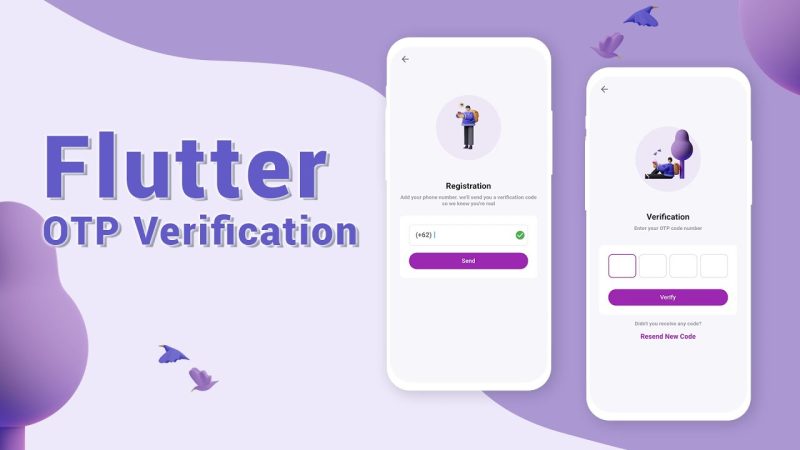
Designing a Login Page with Mobile Number and OTP in Flutter
In this tutorial, we’ll design a simple login page in Flutter with mobile number input and OTP (One-Time Password) verification functionality. This is a common requirement in modern mobile applications for authentication. The tutorial will cover the following:
- Creating a login screen with a field to input the mobile number.
- Sending OTP to the entered mobile number (simulated for this tutorial).
- Verifying the OTP with a second screen.
Let’s get started!
1. Setting Up Flutter Project
First, ensure that you have Flutter installed on your machine. You can check the installation guide on the official Flutter website. Once Flutter is installed, create a new Flutter project:
flutter create otp_login cd otp_loginOpen the project in your favorite IDE (VSCode, Android Studio, etc.).
2. Installing Dependencies
For the OTP verification, we will simulate sending and verifying OTP using some simple logic. If you want to implement actual backend integration, you can use services like Firebase Authentication or other APIs. For now, we’ll use a basic approach.
You can also install a package for phone number validation (optional):
dependencies: flutter: sdk: flutter intl_phone_field: ^2.0.1 # Optional for phone number validationRun flutter pub get to install the dependencies.
3. Creating the UI
We’ll design two screens:
- Mobile Number Screen: A text field to enter the mobile number.
- OTP Screen: A text field to enter the OTP.
Here is the code for both screens.
Main.dart
import 'package:flutter/material.dart'; import 'package:intl_phone_field/intl_phone_field.dart'; // Optional import 'otp_screen.dart'; // OTP Screen void main() { runApp(MyApp()); } class MyApp extends StatelessWidget { @override Widget build(BuildContext context) { return MaterialApp( debugShowCheckedModeBanner: false, title: 'Flutter OTP Login', theme: ThemeData( primarySwatch: Colors.blue, ), home: LoginPage(), ); } } class LoginPage extends StatelessWidget { final TextEditingController _phoneController = TextEditingController(); @override Widget build(BuildContext context) { return Scaffold( appBar: AppBar( title: Text('Login with Mobile'), ), body: Padding( padding: const EdgeInsets.all(16.0), child: Column( mainAxisAlignment: MainAxisAlignment.center, children: [ // Mobile number input IntlPhoneField( controller: _phoneController, decoration: InputDecoration( labelText: 'Mobile Number', border: OutlineInputBorder(), ), initialCountryCode: 'IN', // Country code (set for India) onChanged: (phone) { print(phone.completeNumber); }, ), SizedBox(height: 20), ElevatedButton( onPressed: () { String phoneNumber = _phoneController.text; if (phoneNumber.isNotEmpty) { // Navigate to OTP screen Navigator.push( context, MaterialPageRoute( builder: (context) => OTPPage(phoneNumber: phoneNumber), ), ); } else { // Show error ScaffoldMessenger.of(context).showSnackBar(SnackBar( content: Text("Please enter a valid phone number."), )); } }, child: Text('Send OTP'), ), ], ), ), ); } }OTP Screen (otp_screen.dart)
import 'package:flutter/material.dart'; class OTPPage extends StatefulWidget { final String phoneNumber; OTPPage({required this.phoneNumber}); @override _OTPPageState createState() => _OTPPageState(); } class _OTPPageState extends State<OTPPage> { final TextEditingController _otpController = TextEditingController(); // Simulated OTP String _otp = "123456"; void _verifyOTP() { if (_otpController.text == _otp) { // OTP is correct ScaffoldMessenger.of(context).showSnackBar(SnackBar( content: Text('OTP Verified!'), )); // Navigate to home or next screen } else { // OTP is incorrect ScaffoldMessenger.of(context).showSnackBar(SnackBar( content: Text('Invalid OTP! Please try again.'), )); } } @override Widget build(BuildContext context) { return Scaffold( appBar: AppBar( title: Text('OTP Verification'), ), body: Padding( padding: const EdgeInsets.all(16.0), child: Column( mainAxisAlignment: MainAxisAlignment.center, children: [ Text( 'Enter the OTP sent to ${widget.phoneNumber}', style: TextStyle(fontSize: 16), ), SizedBox(height: 20), // OTP input field TextField( controller: _otpController, keyboardType: TextInputType.number, decoration: InputDecoration( labelText: 'OTP', border: OutlineInputBorder(), ), ), SizedBox(height: 20), ElevatedButton( onPressed: _verifyOTP, child: Text('Verify OTP'), ), ], ), ), ); } }Explanation of Code
- Login Page:
- The user can input their mobile number using the
IntlPhoneFieldwidget from theintl_phone_fieldpackage. This widget provides a country code dropdown and ensures that the mobile number format is correct. - After entering the number, the user can press the Send OTP button, which navigates to the OTP page and passes the entered mobile number.
- The user can input their mobile number using the
- OTP Verification Page:
- This page displays a text field for entering the OTP.
- The OTP is hardcoded as “123456” for simulation purposes. In a real-world app, you would send this OTP to the user’s phone number via an API (e.g., Firebase Authentication, Twilio).
- After entering the OTP, the user can press the Verify OTP button. If the OTP matches the hardcoded value, a success message is shown. Otherwise, an error message is displayed.
4. Running the Application
Once you’ve added the code, you can run your app on an emulator or a physical device by using the following command:
flutter run5. Improving the Application
In this simple tutorial, we’ve simulated the OTP process. To make this app functional in a real-world scenario, you can integrate it with Firebase Authentication or other backend services to generate and send OTPs.
Firebase Authentication Integration
To integrate Firebase Authentication for sending OTPs and verifying them:
- Set up Firebase in your Flutter app by following the Firebase setup guide.
- Use Firebase’s
verifyPhoneNumbermethod to send the OTP to the user’s phone number. - After the OTP is sent, verify it using Firebase’s
PhoneAuthCredential.
This Flutter tutorial demonstrated how to build a login page with mobile number and OTP verification. We covered:
- Creating a UI with a phone number input field.
- Simulating OTP sending and verification on a second screen.
- Using Flutter’s built-in widgets for smooth UI design.
You can extend this project by integrating actual OTP sending via backend services like Firebase or other SMS APIs.
